CPR Instructor classes Tampa Florida
 by Laura Crider
- Apr 22, 2026
- 0
- Category: CPR in Florida, In-Pulse CPR company news
In-Pulse CPR is an American Heart Training Center leader. We are the largest and most respected provider of community based classes in the area. Learn to be an instructor from the best!
Why train with us? In-Pulse CPR has trained over 150 thousand students since 2009 . Our instructors are passionate about teaching and it shows. We have thousands of reviews from students on Google, Trustpilot and reviews.io that rave about our classes.
Do your research, you won’t find a better taught class in the state.
Please note: We limit our instructor classes to 2 or 3 a year. Our next class is on:
Click on class for more information and to register
No dates shown or class full? Request to be on a waiting list!
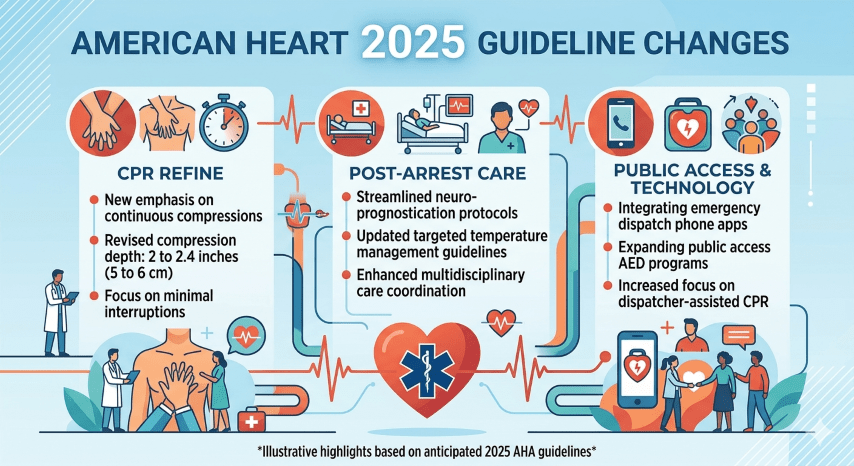
American Heart Association AHA BLS Healthcare Provider Instructor Training
HeartSaver CPR Instructor Certification
Equivalent Red Cross ARC CPR Instructor Classes
“Why would I want to be a CPR Instructor?”
5 reasons why you should
Easier than you think – View the steps below
Frequently asked questions
Starting a new career as a CPR instructor is affordable and can be very rewarding. The demand for more community taught classes is growing. You could help fill that need.
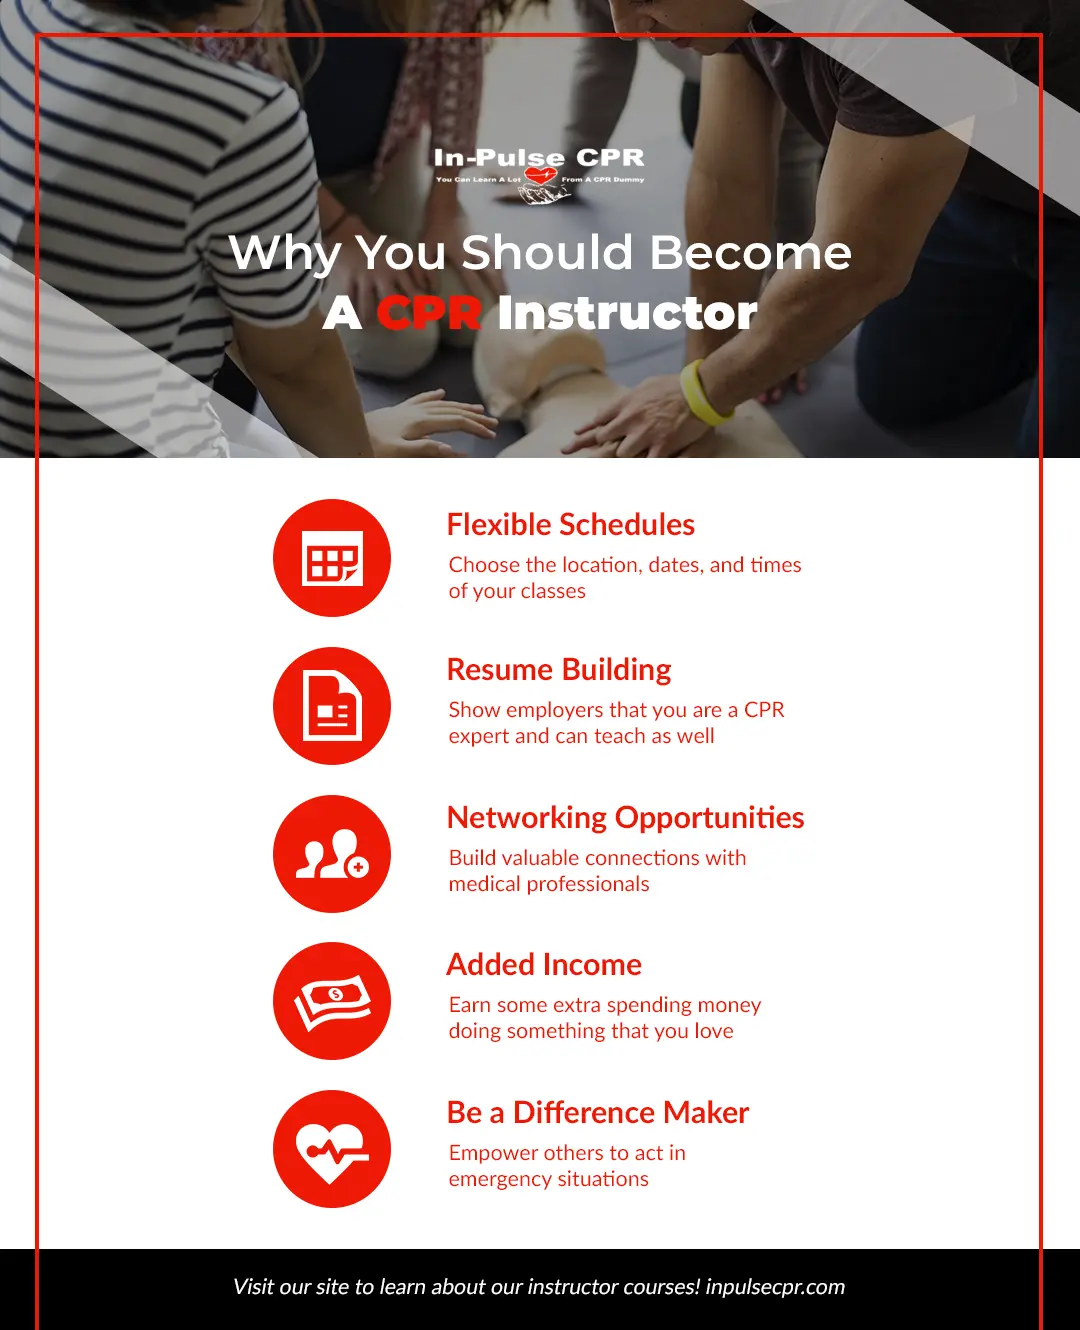
5 Reasons Why you should become a CPR Instructor
Becoming an American Heart Instructor: You believe in the tremendous importance of CPR classes, and you have learned a lot by participating in these courses. If you are passionate about training and helping others, now is a great time to consider taking the next step and becoming an American Heart instructor. Once you complete your training, you’ll be able to take advantage of attractive benefits. Here are some of the reasons why becoming an American Heart instructor could be the perfect fit for you.
You can set your own schedule.
Flexibility is an important benefit to today’s job seekers, and working as a CPR instructor offers the schedule flexibility that you’ve been searching for. Once you are a certified instructor, you can choose the location, dates, and times of your classes. Teach classes on weekday evenings for busy parents, or schedule sessions during the day in corporate environments.
You can add impressive experience to your resume.
You want to give yourself every advantage in today’s competitive job market. If you are already working as a health professional, your current and potential employers will appreciate seeing the American Heart Instructor certification on your resume. This certification does not only mean that you are a CPR expert; it also shows that you have experience in teaching, speaking in front of a group, and instructing a class. Employers in a wide range of settings value these skills.
You can enjoy networking opportunities.
As we chat with those who are currently working as American Heart instructors, we find that many of them have made valuable connections through their classes. CPR certification is a requirement for all medical professionals, so you’ll have students from medical facilities throughout our local area. Whether you are looking for a new job now or sometime in the future, it’s helpful to have connections with medical professionals from a variety of specialties.
You can enjoy extra income.
Organizations ranging from schools to recreation departments realize the importance of providing quality CPR training for their employees. As they pay for these courses, you’ll be able to enjoy the benefit of extra income. Even if you only teach for part-time hours, you can earn additional funds for vacations, holiday gifts, and more.
You can make a life-changing difference.
We’ve saved the most important benefit of working as a CPR instructor for last. The process of teaching is rewarding, and it is even more so when the methods you are sharing can change lives. You’ll love seeing students leave your classes feeling empowered to act confidently in emergency situations. As your students go out into their families, work places, and communities, they have the power to save lives thanks to your careful instruction.
Steps Needed to Become a CPR Instructor
The steps are simple – get started today!
- Approval to align with a local American Heart Training Center – The American Heart requires this. The good news is In-Pulse CPR is an AHA Training Center (TC) and is currently accepting instructor alignments in Florida.
- Have a non-expired valid BLS and / or HeartSaver CPR certification before you attend an instructor class. Register Here! (Must be an American Heart certification)
- Sign up, attend, and successfully complete the classroom Instructor Course. Call us at 813-343-4024 for information about our next class or visit the link at the top of this page to register online.
- Successfully be monitored teaching your first course within six months of completing Instructor Course. Training Center Coordinators can require additional monitoring.
FAQ’s New CPR Instructors Ask
- What does it cost to become an American Heart Instructor?
A new instructor should be prepared to spend a minimum of about $900-$1200 to get started. As you grow, you can add to your inventory with more supplies and equipment as needed. The more equipment you have to teach with the larger your classes can be. A few of your startup costs include:
-The Instructor course, alignment fee, and monitoring ($300-$500)
-Manikins (a functional manikin can be purchased for around $160)
Most instructors / teachers have multiple manikins.
-AED trainers (start at about $120 each)
-Additional training supplies and start up costs ($ varies)
-Marketing / Website ($ varies)
You may be able to help cut initial costs by finding used equipment to start out with. - Who do I train?
Some people you might initially train are your family and friends, your church, or past employers. As you grow your business you may want to reach out to small to medium medical clinics, dental offices, daycares, and schools. There are thousands of people within your community who need this training. Many need CPR/ BLS training as a requirement for their job. This training needs to be completed every two years. BLS stands for ‘Basic Life Support’. It is often synonymous with CPR, more commonly refers to the medical side of CPR training that includes other life support functions like dealing with choking, assisted breathing, AED use, etc. As a BLS Instructor , you can teach healthcare CPR classes, as well as, laymen CPR (commonly known as HeartSaver CPR). - Where can I teach?
Geographically speaking, you can teach anywhere. There are some restrictions on handing out a certification to someone outside the country though. - Once I take this class and start teaching CPR, who is my employer?
This depends. Is an employer paying for your class and startup costs? Then they are probably your employer. If not, you are self employed. Being a self employed independent CPR instructor has many advantages. See 10 Benefits of Being Self-Employed. - Do I need a Healthcare background or public speaking experience to be a CPR instructor?
The short answer is No, anyone can become a CPR instructor regardless of their background. That being said, having past experiences helps. If you are planning on teaching CPR to healthcare workers, it is hard to develop a rapport with your students if they have a medical background and you don’t. If you are only planning on teaching to non-healthcare students like that found at your church, warehouse staff, daycares, teachers, and similar, than a medical background is not important. Likewise, if you have public speaking experience and are an effective communicator, you may be skilled enough to establish a repour with many different types of audiences. Most new instructors have a few fears at first. The more often you teach, the more you can sharpen your communication skills and become a better instructor and communicator. The better you can connect with your students helps develop that trust your students are seeking. Having a good rapport with your students is huge; it is the difference with them giving you repeat business and passing referrals, to never doing business with you again.
When you attend an INSTRUCTOR CLASS with In-Pulse CPR, we will cover many of these questions within the course.