
Camping Safety Tips

Camping is an activity that’s enjoyed by millions every year, and the best thing about this activity is that it can be enjoyed year round – winter, spring, summer and fall.

So, whether you plan on roughing it in a tent or planning a family outing to a national park, there’s no reason why you shouldn’t make safety your #1 priority.

To have an enjoyable and safe camping experience, consider the following safety tips:

  • Remember to pack a first aid kit.  You never know if you or a member of your camping group will end up getting stung by a bee and suffer from an allergic reaction.  Or one of you may end up falling and getting injured.  It’s always best to be prepared if the unfortunate should happen.  Make sure to pack these items:  antiseptic wipes for cuts and scrapes, insect repellent, a snake bite kit, pain relievers, bandaids, antibacterial ointment, tweezers, and any medication that you’re currently on.  Be sure to always check the expiration dates before packing the medication and ointment.
  • Don’t forget to bring along emergency supplies.  These supplies include (but are not limited to): map, compass, flashlight, knife, warm clothing, whistle, water, high-energy food and a compact weather radio.
  • Find out the weather report before you leave, and be alert to approaching storms and seek shelter as necessary.
  • Before you leave for your camping trip, always tell someone where you’ll be and when you plan to return home.  This is just in case something happens and someone needs to come find you.
  • Arrive to your actual campsite before it starts getting dark.  This will give you time to check over the entire campsite and set it up.
  • Check for potential hazards at the campsite such as poison ivy, bees, wasps, branches, hazardous terrain, etc.
  • Always return back to your campsite before dark.
  • Be sure to familiarize yourself with poisonous plants in the area.  If you come into contact with any poisonous plants, rinse the affected area immediately with soap and water.
  • Avoid bugs such as hornets, bees, wasps and yellow jackets.  If you come into contact with these, never swat at them.  That’ll only aggravate them.  Simply push them away.  To avoid attracting these stinging insects, remember to never wear cologne or perfume.
  • Only build a fire in a safe area, away from your tent.  Also, you should never use a flame or any heating device inside your tent.  Use a battery-powered light instead.
  • Make sure your tent is made from a flame-retardant material.
  • Make sure your campfire is always attended to.  When you put the fire out, make sure you drown it with water and make sure all of the embers are wet.  This is VERY important because embers that are buried deep within the pile have a tendency to flame back up at a later time.
  • Use a propane stove as a cooking appliance ONLY.
  • To keep bears and other wildlife away, keep your campsite clean and your food securely packed away.
  • Your group should always decide on a meeting place in case one of you should become separated.

KEEPING SAFE WHILE BOATING IN TAMPA


First – Check the Weather Forecast

If you enjoy boating, then safety should be first and foremost in your mind when navigating the coastal waters of Tampa, Florida. Before you set out on any boating excursion then, you want to make sure that the weather stays pleasant. Therefore, don’t leave the dock without confirming that the breeze will stay balmy and the sun will continue to shine during you boating journey.

Safety Items to Include Onboard

In addition to making sure that the weather will be cooperating when you are sailing or boating, you will need to make certain that you have the necessary safety equipment in place and on board. Necessary items include:

  • A first aid kit;
  • Flashlight;
  • Throwable cushions;
  • Coast Guard approved life jackets;
  • Ladder;
  • GPS;
  • Boat anchor;
  • Lines;
  • Hook; and
  • Flares

Other Precautions to Take before you Set out on your Trip

Communication equipment should include a VHF marine radio and cell phone. In addition, make sure you have a stock of extra batteries. If you are going on a day trip, take along provisions, such as food and drinking water. Also, before you make your departure, you will want to check the gasoline and fluid levels and make sure you leave an itinerary with close friends or non-boating members of your family.

Turn Around if Bad Weather Looms on the Horizon

Although you may check to ensure that the skies will stay clear, that doesn’t mean that there isn’t the possibility that the forecast will change. If you learn that a thunderstorm is headed your way, then it’s best to get back to the port immediately. Because you can receive a lightning strike from as far of distance as 20 miles, you need to turn around when storm clouds begin to loom on the horizon. Make sure everyone onboard is wearing his or her lifejacket too.

In Case of a Storm . . .

Should a storm catch you by surprise, you will need to batten down the hatches and secure the ports or, if on a sailing vessel, minimize the sails. If you and your passengers are on a small vessel, then the passengers need to go to the centerline and bottom of the boat. In addition to life jackets, everyone onboard should also wear shoes that safely grip the deck.

Tampa Residents Can Obtain Boater Safety Training Online

Safety should always be a priority when it comes to boating. The Florida Fish and Wildlife Conservation Commission offers a basic boating safety course online that meets Florida’s mandatory safety training in boater education. The course is approved by the state of Florida and recognized by the U.S. Coast Guard. You can obtain further information by visiting the Florida Fish and Wildlife website.


References:

https://www.sptimes.com/gulfandbay/boatsafety.shtml

https://www.boatingbasicsonline.com/content/fl/

https://myfwc.com/


As an added safety precaution, why not take an In-Pulse CPR safety course in CPR and First Aid?


Are your children playing it safe?

It’s a hot summer day… Your child asks you if he or she can go to the playground. Seeing nothing wrong with this, you decide to take them. When you arrive, there are many parents playing with their kids. Your little one soon scampers off, to play with the others. You find yourself enjoying the day, and chatting with another one of the parents while you watch your children play. You glance away for one moment.

Suddenly, your child is gone! You can’t see them anywhere! In a panic, you look around everywhere but they’re nowhere in sight… A simple outing managed to turn into a horrifying experience in a mere second.

How could this have been prevented? By teaching your children to play it safe. Sometimes bad things can happen in only a moment’s notice. It does not take long for something to go wrong. Kidnapping for ransom is a more common occurrence than many people think. Around 12,500-25,500 kidnappings occur annually. Kidnapping has also been linked to piracy and terrorism. With these difficult financial times that we’re facing as of recent, many people are turning to crime as a source (or attempted source) of income.

It’s important that your children know the proper thing to do in such situations. You should start with explaining to them not to talk to strangers, and how to tell which strangers are bad. If it’s someone they’re not introduced to, or don’t know, they should come to you right away. Teach them how to spot suspicious activity.

Let them know they can always come to you with their problems. If your children don’t feel they can talk to you about things, they may not tell you when something is amiss… Don’t allow them to take candy or toys from anyone except you or a designated, responsible adult (such as a sibling, a babysitter, a teacher, or etc.) who is taking care of them. And always make sure you keep a keen eye on children as they’re playing. Be certain that you know what they’re doing and who they’re with at all times, for their own safety.

When you’re at the playground, make sure you ask yourself… Are you and your children really playing it safe? It’s always better to be safe than sorry.

First Aid Kit for Hiking

Hiking is a great outdoor activity that can give you well-rounded, and balanced benefits. Most people to hike for the pure enjoyment of the sport; to get out in nature and see the sites. Exercise is another motivating factor behind hiking. It is a great way to get a good cardio, as well as muscle toning benefits in one mode of exercise.

As enjoyable as hiking can be, there are a number of risks involved, especially depending on where you choose to hike. Because accidents do and can happen during even the most benign hike, you will want to make sure you carry a first aid kit. In your first aid kit you should have specific items so that you can tend to a variety of issues or injuries because no matter how much you plan, there is always the risk of that unexpected accident.

Putting together a first aid kit properly is important. There are certain items that should be a staple in each kit. Other items may not be necessary; and can just bulk up your kit and make it heavier and harder to carry on a casual hiking excursion.

For a generalized first aid kit, you will want to make sure you have the following:

Ÿ  Insect repellant

Ÿ  Pocket knife

Ÿ  Ace bandages

Ÿ  Sterile bandages

Ÿ  Bandage tape

Ÿ  Antiseptic lotion or ointment

Ÿ  Blister protectors

Ÿ  Pain reliever, such as Tylenol

If you suffer from allergic reactions, you will also want your allergy meds, whether it is an over-the-counter allergy medication such as Benadryl, or you require an Epi-Pen. You never know if you will encounter allergens on a hike or a bee sting, and as any doctor will tell you, it is better to be safe than sorry. It is better to be prepared and not need it, rather than not have what you need, and wish you had it.

Nothing can replace being prepared for an unexpected injury. The better you are prepared to handle injuries on your hike, the more enjoyable it will be. You will be able to hike and know that should an injury occur, you are prepared to deal with it.


Packing for Camping Safety


There is nothing more peaceful than a trip to the great outdoors. Being amongst nature is a relaxing departure from the daily grind. Camping may seem, to some, a rather passive activity requiring little forethought. However, this could not be further from the truth. Without proper packing, camping can indeed be extremely dangerous. Smart packing means safe camping, don’t be caught without these essential items.


  • First-aid kit- No matter whether you are camping in a busy campground or out in the wilderness, a fully stocked first aid kit is essential. Don’t forget the insect repellent and sunscreen. Learn how to administer basic first aid and CPR in case of an emergency.


  • A map, compass or GPS – It is fun to take off from your campsite and meander through the woods, however, you if you lose your bearings you will wish you had brought a locator and a map.


  • A flashlight, lantern and extra batteries – Once the sun goes down it is exceptionally dark, especially in remote camping areas. A flashlight and lantern come in handy for finding your way safely in the dark, warding off wildlife or enjoying after-dark activities in your tent.


  • Bottled water – Plenty of fresh water is essential, especially if you are going to be doing a lot of hiking or other physical activity or if it is extremely hot.


  • High-quality waterproof tent – Don’t skimp on the quality of your tent. Be sure it allows for ventilation and will keep you dry.


  • Waterproof fire starter – Fire keeps you warm and allows you to cook your food.


  • A Swiss army knife – A multifunctioning knife is an invaluable tool for any camper and takes up very little space in your pack.


  • Hand sanitizer and soap – Good hygiene is just as crucial while camping, as it is anywhere else. Always wash your hands before handling food and after using the restroom.


  • High-energy food in secure containers – Always pack food that will provide quick energy and require minimal preparation. Be sure to store all food in airtight containers.


  • Rope – Rope is useful for a drying rack, to tie garbage up where animals cannot reach it or to secure items during high winds.


  • Battery-operated weather radio – A pleasant day can suddenly become stormy. A weather radio warns of inclement weather allowing you plenty of time to seek shelter.


  • A whistle – Warn others of danger or your whereabouts with a whistle. Always wear the whistle while hiking and use when you need help.


Are you really safe when you go to the beach?


Swimming seems like such a simple thing. It’s something that most Floridians don’t really give a second thought to. But how do you know when you are at the beach with your family that you are really safe? There are many dangers when going to the beach.

For children, it’s probably a good idea to make sure they know how to swim properly before going into the water. Perhaps try looking up some swimming classes online if you need to. A qualified instructor can ensure that everyone knows how to swim.

Make sure not to leave your children unattended, not even for a short amount of time. Another good idea is to designate a specific area where it is known to be safe for your child to swim. This area should be free from things like dangerous rocks, boating activity, and very deep water. Make sure your child always stays in the designated swimming area. Avoid large waves.

It’s always best not to rely on a flotation device to save your life, even if it is designed for that purpose. Most pool toys are not made to save lives, only for fun for those who already know how to swim.

It’s a good idea to check the news and local weather for the tides and weather forecast  Also, watch out for rip currents, also known as undercurrents or undertow. If it’s going to storm, it’s best to reschedule the outing for another day.

It’s a good idea to have a talk with all family members, and make sure everyone understands what to do in an emergency. You should also familiarize yourself and your family with how to signal for help, and how to recognize another’s signal for help. It’s important to make sure everyone knows CPR, as well. It could save lives. Many mishaps and accidents could be prevented with proper planning.

Also, it is important that people understand the different aquatic wildlife in the area. Many species are poisonous or dangerous to humans.

With so many dangers out there, it’s important to be fully prepared for any emergency or situation that might come up. Hopefully in the future we can all learn to be more cautious when going to the beach.

12 Essential Hiking Safety Tips for Tennessee Trails

 From the rolling hills of Middle Tennessee to the rugged beauty of the Great Smoky Mountains, Tennessee offers some of the most scenic hiking in the Southeast. Families explore waterfall trails near Chattanooga, weekend hikers head to Fall Creek Falls, and adventure seekers climb high-elevation routes in the Smokies.

But Tennessee’s natural beauty comes with real outdoor risks.

Heat, humidity, wildlife, rocky terrain, and sudden weather changes can quickly turn a peaceful hike into a dangerous situation.

Before you head out on any Tennessee trail, review these essential hiking safety tips.


1. Plan Ahead for Tennessee Weather

Tennessee weather changes quickly, especially in higher elevations like the Great Smoky Mountains National Park.

Before hiking:

  • Check the local forecast
  • Monitor heat index in summer
  • Watch for thunderstorm alerts
  • Confirm park closures or trail advisories

Mountain weather can differ dramatically from nearby towns.


2. Research the Trail Conditions

Popular Tennessee hiking destinations include:

  • Great Smoky Mountains National Park
  • Fall Creek Falls State Park
  • Cummins Falls State Park
  • Radnor Lake State Park
  • Savage Gulf State Park

Each park has different terrain, elevation changes, and difficulty levels. Know what you’re walking into before you start.


3. Understand Tennessee Wildlife and Plants

Tennessee trails are home to:

  • Black bears (especially in East Tennessee)
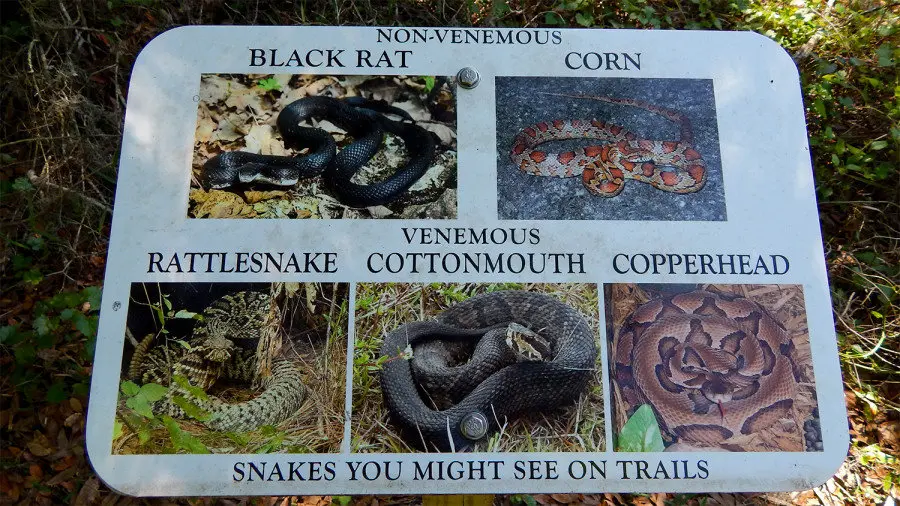
  • Copperhead snakes
  • Ticks
  • Poison ivy and poison oak

Learn how to identify and avoid these hazards before your hike.


4. Never Hike Alone in Remote Areas

While solo hikes can be peaceful, Tennessee’s wooded terrain can make navigation difficult if you become disoriented.

If hiking in remote areas of East or Middle Tennessee, bring at least one companion.


5. Tell Someone Your Exact Location

Always let someone know:

  • The trail you’re hiking
  • The trailhead parking area
  • Your expected return time

If you don’t check in, this information is critical for search and rescue teams.


6. Start Early to Beat the Heat

Tennessee summers are hot and humid. Heat exhaustion is one of the most common hiking emergencies statewide.

Start your hike early in the morning to avoid:

  • Midday heat
  • Severe dehydration
  • Afternoon thunderstorms

7. Bring More Water Than You Think You Need

Dehydration can happen quickly in Tennessee humidity.

Avoid drinking from:

  • Rivers
  • Waterfalls
  • Natural springs

Unless properly filtered, untreated water may contain bacteria or parasites.


8. Pack Sealed, Wildlife-Safe Snacks

In areas like the Smokies, food scents can attract wildlife.

Pack:

  • Granola bars
  • Trail mix
  • Protein snacks

Keep all food tightly sealed and stored properly.


9. Protect Against Sun and Heat

Even shaded forest trails expose hikers to UV radiation.

Wear:

  • Sunscreen (SPF 30+)
  • A breathable hat
  • Lightweight long sleeves
  • Proper hiking footwear

Sunburn and heat stress can end a hike early.


10. Carry a Fully Charged Phone (But Don’t Rely on It)

Cell service can be unreliable in mountainous or rural Tennessee areas.

Download offline trail maps before leaving. Consider carrying a portable battery pack.


11. Bring a Basic First Aid Kit

Tennessee trails often include:

  • Rocky terrain
  • Steep drop-offs
  • Slippery waterfall areas

A hiking first aid kit should include:

  • Bandages
  • Gauze
  • Antiseptic
  • Blister treatment
  • Elastic wrap

Minor injuries are common. Be prepared.


12. Watch Your Step

Many Tennessee hiking injuries occur from:

  • Loose gravel
  • Exposed roots
  • Wet rocks near waterfalls
  • Muddy slopes

Also stay alert for snakes sunning on trails, especially during warmer months.

Enjoy the scenery, but stay aware of your footing.


Hiking Safely in Tennessee Means Planning Smart

Tennessee offers breathtaking outdoor experiences year-round. From Smoky Mountain overlooks to waterfall trails in Middle Tennessee, adventure is everywhere.

But preparation is what keeps adventure enjoyable.

When you plan ahead, hydrate properly, carry basic safety supplies, and respect the environment, you dramatically reduce your risk and increase your confidence on the trail.

Nature rewards preparation.


Frequently Asked Questions About Hiking Safety in Tennessee

What are the biggest hiking safety risks in Tennessee?

Common hiking risks in Tennessee include heat and humidity, sudden mountain thunderstorms, slippery rocks near waterfalls, ticks, poison ivy, and wildlife encounters such as snakes and black bears, especially in East Tennessee and the Smoky Mountains region.


Is it safe to hike in the Great Smoky Mountains without a guide?

Yes, many hikers safely explore the Great Smoky Mountains without a guide when properly prepared. Always check trail conditions and weather forecasts, carry enough water, stay on marked trails, and inform someone of your hiking plans before leaving.


What should I pack for a Tennessee day hike?

A Tennessee hiking checklist should include plenty of drinking water, sealed high-energy snacks, sunscreen, insect repellent, proper hiking shoes, a basic first aid kit, a fully charged phone, and downloaded offline trail maps.


Can you drink water from Tennessee streams or waterfalls?

No. Water from streams, rivers, or waterfalls in Tennessee may contain bacteria or parasites. Only drink natural water sources if you have proper filtration or purification equipment.


When is the best time of day to hike in Tennessee?

Early morning is typically the safest time to hike in Tennessee. Starting early helps hikers avoid extreme afternoon heat, humidity, and the thunderstorms that frequently develop later in the day.


What should I do if I encounter a black bear while hiking in Tennessee?

Remain calm and give the bear plenty of space. Do not run. Slowly back away while facing the bear, keep children close, and make yourself appear larger while speaking firmly until you safely create distance.


How can I prevent tick bites while hiking in Tennessee?

Wear long pants and sleeves when possible, apply insect repellent, stay centered on trails, and perform a full body tick check after your hike. Showering shortly after hiking can also reduce tick exposure.


What are the most common hiking injuries in Tennessee?

Typical hiking injuries include ankle sprains from uneven terrain, slips on wet rocks near waterfalls, dehydration during hot weather, and minor cuts or scrapes from rocky trails.

Article rewrite by Troy Bowman, 2026

Beach Safety Tips for a Safer Summer

Beach Warning Flags

 You see them flying on all of Florida’s public beaches, they are there to let swimmers know if it is safe to swim or not but, do you really know what they mean? The beach is a wonderful place to spend a hot summer day but, the ocean can change very quickly and knowing what the Beach Warning Flags mean can mean the difference between life and death for you, your loved ones, or others near by.

Why Do Public Beaches Need Warning Flags?

Public beaches as well as many private beaches in Florida have many visitors each year. Often these visitors don’t realize that there are many natural occurrences in the ocean that can and do affect the safety of swimmers such as; tide, rip currents, marine life that may be in the area. The Beach Warning Flags warn us of such dangers.

 What Do They Mean

There are five different Beach Warning Flags, each meaning a different thing and each, a different color. As in most cases RED indicates danger and is the most significant of the Beach Warning Flags and should be adhered to always.

Double Red –Water is closed to swimmers, sometimes this flag has a picture of a swimmer with a white line through it, which again means No Swimming!

Single Red – One red flag means that you can still swim but, you should use extreme caution and get out of the water if at any time the current becomes stronger or the waves larger. Stay within sight of a Lifeguard at all times.

Yellow – Moderate waters can be really fun to play in but, extreme caution is necessary when the yellow flag is flying. A yellow flag represents strong dangerous currents, surf, undertow, rocks, sudden drop offs, or any number of potential dangers, If you’re unsure ask the life guard.

Green – The Green Beach Warning Flags says that all is good and it’s okay to swim. Just remember that the ocean can change very quickly so it’s always a good idea to keep an eye on the Beach Warning Flag and the Lifeguard.

Blue or Purple – Dangerous marine life such as sharks and jellyfish can really mess up a day at the beach but, they are a part of the ocean and to be expected from time to time. If you see a blue or purple flag it doesn’t mean that can’t swim, only that you should be cautious while swimming and keep an eye out. These flags are often used in conjunction with other flags.


Breaking Falls Safely – Home Playground Equipment

Although we often hear of the children injured on public playgrounds, over 50,000 youngsters suffer from accidents annually on home playground equipment. Time and planning are essential when considering installation of such equipment. Although it is beneficial to provide your children with a physical outlet, securing their safety should always be the first matter of business.

Since the majority of injuries are the result of falls, exceptional care must be taken when selecting protective surfacing. Never place playground equipment over asphalt or concrete. If a child falls on these surfaces, serious head injuries can occur. Choose softer surfaces with some give. Some people consider grass such a surface, however, turf has a tendency to lose its shock absorption capabilities over time as it becomes compacted. Although grass is better than concrete, consider the following surface coverings instead:

§ Finely crushed gravel

§ Sand

§ Fine woodchips

§ Playground approved rubber matting or rubber mulch

It is not necessary to cover the entire playground surface in shock absorbing material, as this can be quite expensive. Identify the places where a fall may be likely and cover these areas 6 feet in all directions. If the highest fall point is up to 6 feet, you will need at least 6 inches of surface material. Use 12 inches of material for any height over 6 feet.

If you have swings on your play set, these must also have safe landing spots. Make a 6-foot outline from the outer edge of the swing set on both sides. Make an outline in the front and back of the swing that is twice the measurement from the ground to the swing hangers.

An alternative to spot protection, although more expensive, is to use a rubber matt, rubber tiles or rubber mulch over the entire play area. Rubber playground mats are available in various thicknesses. Be sure to select a thickness that is adequate for the height of your equipment.

Check the depth and condition of your surface material often in order to avoid unnecessary injuries.


Going to the Beach? Remember, Safety Comes First!

In my opinion, there’s nothing more fun to do in the summer than take a beach vacation.  Growing up, my family and I would visit the beach multiple times a year and we all loved it!  Splashing in the waves, walking on the wet sand, collecting shells – it can’t get much better than that!

Even though beach vacations are a lot of fun, they can also be very dangerous unless certain precautions are taken.

Before visiting the beach, please refer to the 15 safety tips I’ve listed below.  Not only will following the tips make your beach trip more enjoyable, they may also save your life.


  1. To avoid sunburn, use a sunblock before going out in the sun.  SPF 30+ is recommended.  Reapply it every hour and also after exiting the water.
  1. Bring a first aid kit with you.  In case you cut your foot on a shell, or even get stung by a jellyfish, you’ll be able to treat it with some basic first aid items from the kit.
  1. To protect your eyes, always wear UV protective shades.
  1. Always bring bottles of fresh water with you and drink the water regularly so you won’t get dehydrated.
  1. Bring along some shade, such as an umbrella or tent.  A wide-brimmed hat will also keep the sun off you.
  1. Always watch where you step.  Most beaches don’t allow glass bottles but there are always those who won’t follow the rules.  To avoid getting cut by a piece of glass, watch where you step.
  1. Swim only at beaches with lifeguards.  According to statistics, it’s much safer to swim on beaches that have lifeguard services.  If you ever get in trouble, raise your hand for assistance and a lifeguard will come to help you.
  1. Remember to swim between the flags.  The common flag system for beaches is: Double Red (2 Red Flags) – Extremely Dangerous Conditions
    Red – Dangerous Conditions
    Yellow – Caution (Moderately Dangerous Conditions)
    Green – Mild Conditions
    During the day, flags may be moved so be sure to always check where they are before you go out in the water.
  1. You should never swim alone.  You need to always swim with another strong swimmer when you venture into the water.
  1. Never dive in.  Two-thirds of ALL catastrophic neck injuries happen in open water.  The sand isn’t as soft and forgiving as you may think it is.
  1. Remember to take a break every hour, whether it’s a sun, water or bathroom break.  If you sit on the beach or stay in the water for a long period of time, fatigue, sunburn and heat exhaustion could occur.
  1. When exploring the beach, avoid rocky outcrops.  They can be extremely dangerous in a large surf area.  You should never stand on one that’s wet.  Not only could you slip off, you could possibly be swept off by a wave.  Because the outcrop is wet, that’s a sign that waves will be washing over it.
  1. You should NEVER mix alcohol and swimming.  Alcohol will affect your judgment and you won’t be able to hold your breath.  Approximately 50% of drowning incidents are alcohol related.
  1. Be aware of rips, which are swiftly moving channels of water returning to sea.  Rip currents are the cause of more than 80% of near-drownings in our oceans.  If you’re not exactly sure how to identify a rip, here are some characteristics to look for:
    – There may be rippled effects in the water.
    – The water may be darker due to the sand stirred up off the bottom.
    – There may be calm patches in the surf, and waves will be breaking on either side.
    – The water may be foamy and filled with debris that extends beyond the surf break.
    If you’re ever caught in a rip, remember to stay calm and conserve your energy.  Take a deep breath and swim parallel to the shore.  If you fight the current, it’ll wear you out.  So remember to not panic!
  1. It’s not out-of-the-ordinary for marine life forms, birds and turtles to wash up on beaches.  If you see this happen, do not touch or get close to the animals.  You could hurt them or they could hurt you.  Contact the local authorities and they can take care of the situation.

Babysitting and CPR / First Aid

Babysitting is an important job. It requires first and foremost, the love of children, but beyond that, there are many qualifications you must possess in order to be a good and responsible babysitter. Children of all ages have needs that require tending to. You will need to be aware of the different age groups, and what you can expect to be dealing with for that age before sitting for them.

Babysitting is a big responsibility. The biggest aspect of babysitting is to keep the children safe and away from harm. You want them to be happy and healthy when you hand them back over to their parents. To be a good, responsible babysitter, you will want to  make sure you know and understand:

Ÿ  How to administer first-aid

Ÿ  How to perform CPR

Ÿ  What to do if a child is choking

Ÿ  How to reach the parents – have all contact numbers

Ÿ  Home safety tips

Although the word may imply one thing, babysitting is more than just sitting at someone’s house with their kids. You must be interactive with the children. You must keep them entertained, provide care, possibly feed them a meal, and keep up with their general upkeep. If you are at an age where you are able to drive, you may even be requested to drive the children to an appointment, or pick them up from school. Babysitting can mean a variety of tasks with one basic task remaining the same – watching and caring for children.

If you plan on babysitting often, maybe building a clientele of regular families you baby-sit for, it is a good idea. You may want to find families that use you regularly so that you get to know the family and the children well, and they get to know you. When children get to know you and are used to seeing you, it can make your time with them easier, as well as less frightening for them.

Here is a list of tips for babysitting:

Ÿ  Learn what children of the age group you’ll be babysitting for, like to do – what games they like to play? What activities you can do with them?

Ÿ  Learn their bedtime routines

Ÿ  Keep a list of what foods they like and don’t like; and what they can eat and cannot eat

Ÿ  Do they need to be given medication while in your care? Get the details of what, and how to administer the medicine

Ÿ  Keep a list of numbers handy – the parents’ phone numbers, emergency contact, poison control, neighbors or friends

Ÿ  Have some activities in mind that you can do with them. Keep them occupied so they don’t have time to get upset

The more prepared you are to take care of other people’s children, the better the job you will be able to do


Why not register for a CPR and First Aid class with In-Pulse CPR?  Our classes are geared towards ages as young as 13 years old.


His Team Lost, but He Won!


Leo Staudacher hadn’t planned on watching the Michigan-Notre game on television, let alone in a hospital ICU unit. But he was very grateful to have seen the end of the game at all. The 69 year old Bay City man was watching the game at Michigan Stadium when he collapsed from sudden cardiac arrest, the leading cause of natural deaths in the United States.


Mr. Staudacher’s three sons were with him at the game, but none of them knew what do. That’s not unusual or shameful – most people aren’t trained in CPR. Thankfully for Leo Staudacher and his family, a nearby spectator knew CPR and began performing it on the unconscious man while others went for help. Stadium security personnel used an Automated Electric Defibrillator (AED) to shock Mr. Staudacher’s heart back into normal rhythm. But it was the bystander who started CPR quickly who made full recovery possible.


Sudden cardiac arrest almost always results in death, unless life-saving measures are begun within six minutes of the event. Even in cities with outstanding emergency medical services, that’s often not possible, meaning the difference between life and death hinges on someone close by knowing CPR. Studies have found the survival rate among heart attack victims increases 300% when CPR is begun within minutes.


Statistically, Leo Staudacher was an anomaly, lying in his Ann Arbor hospital bed, watching the Wolverines score a come-from-behind victory over his beloved Notre Dame. “My family watched while they shocked me with the paddles,” he said later, “but it was the fans and their prompt CPR that saved my life.”


Most of us wonder at times about the meaning of our lives. Anyone who has learned the simple process of CPR and has had the privilege of using it to save another human being can answer that age-old philosophical question. The idea that a few hours of training could lead to years added to someone’s life – years during which incalculable good might be done – is both humbling and compelling. The fact is, there’s nothing that stands between you and me and an act of heroism except learning CPR. How many of the 325,000 Americans who die of sudden cardiac arrest every year would survive if more people knew CPR? Hard to say, but one thing is undeniable: your training could save one person whose life has infinite value.

Know the Signs of a Heart Attack and What to Do (2026 Update)

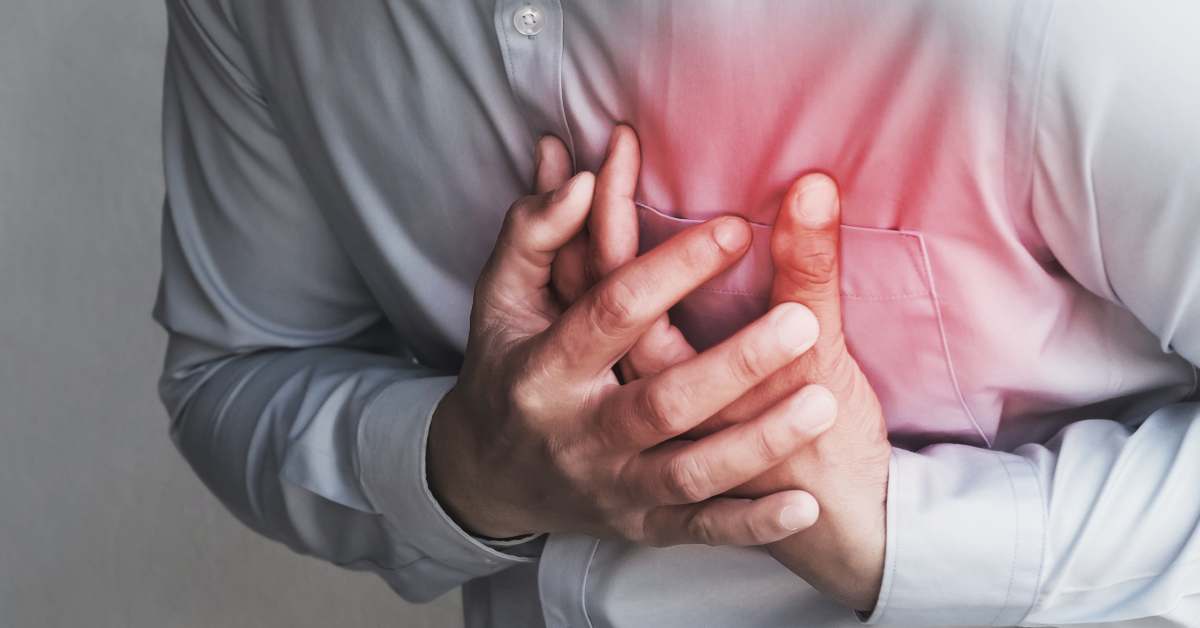
If you or someone near you is having a heart attack, you may have only minutes to act. Heart attacks can strike suddenly and, in some cases, without obvious warning. Knowing the signs — and knowing what to do — can save a life.

“The most dangerous heart attack is the one people wait too long to respond to,” says Dr. Mitchell Elkind, MD, MS, neurologist and former president of the American Heart Association. “When people act quickly, outcomes improve dramatically.”


Common Heart Attack Warning Signs

Seek emergency medical help immediately if you or someone else experiences:

  • Chest discomfort — pressure, squeezing, fullness, or pain in the center of the chest

  • Pain spreading to the shoulders, arms, neck, jaw, or teeth

  • Upper abdominal pain that does not resolve

  • Shortness of breath, even at rest

  • Dizziness, lightheadedness, or fainting

  • Cold sweats

  • Nausea or vomiting

Symptoms may come and go. Pain can ease briefly and return. If symptoms persist or repeat, do not wait.

“People often delay calling 911 because symptoms feel mild or unclear,” explains Dr. Clyde Yancy, MD, cardiologist and AHA guideline author. “That delay is where the greatest risk lies.”


Heart Attacks Don’t Always Look the Same

Not all heart attacks involve crushing chest pain. Some people experience fatigue, shortness of breath, or vague discomfort. Others — especially women, older adults, and people with diabetes — may have minimal or atypical symptoms.

In many cases, warning signs appear hours, days, or weeks beforehand, often as chest discomfort during physical activity that improves with rest.

“The body often sends early signals,” says Dr. Jennifer Haythe, MD, cardiologist. “The challenge is recognizing them and taking them seriously.”


What Causes a Heart Attack?

Most heart attacks occur when a coronary artery becomes blocked, preventing oxygen-rich blood from reaching the heart muscle.

This blockage is usually caused by atherosclerosis, a gradual buildup of cholesterol and plaque inside artery walls. When plaque ruptures, a blood clot can form suddenly, cutting off circulation.

“Once blood flow stops, heart muscle begins to die within minutes,” notes Dr. Robert Eckel, MD, cardiovascular medicine specialist. “That’s why speed matters more than anything else.”


What to Do If You Suspect a Heart Attack

If you think someone may be having a heart attack:

Call 911 immediately.
Do not attempt to drive yourself or the person to the hospital.

While waiting for emergency responders:

  • Have the person sit or lie down and rest

  • If they are not allergic to aspirin and it is not medically contraindicated, give one aspirin to chew

  • Stay with them and monitor breathing and responsiveness

“Chewing aspirin early can help limit clot formation,” explains Dr. Erin Michos, MD, preventive cardiologist. “But it never replaces calling 911.”


If the Person Becomes Unconscious

If the person collapses, becomes unresponsive, or stops breathing normally:

  • Ensure 911 has been called

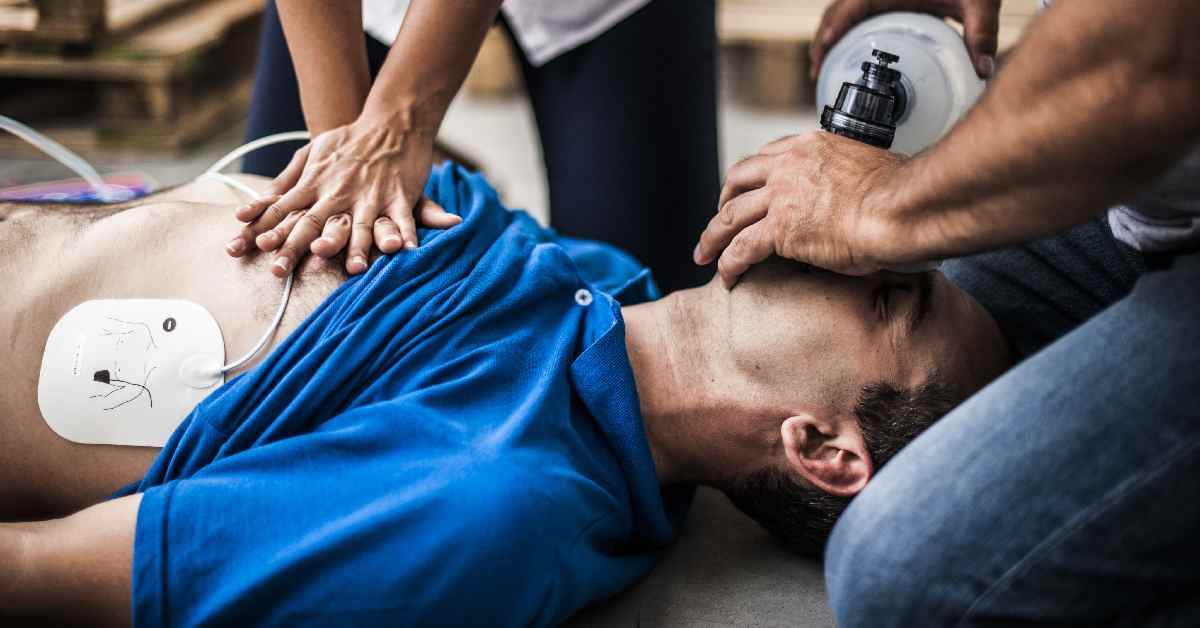
  • Begin CPR immediately

  • Continue CPR until an AED is available or emergency responders arrive

“CPR keeps the brain and heart alive until definitive care can be delivered,” says Dr. Comilla Sasson, MD, emergency medicine physician and resuscitation expert. “It’s one of the most powerful actions a bystander can take.”


The Bottom Line for 2026

Heart attacks remain one of the leading medical emergencies — but survival is strongly influenced by early action.

Recognize the signs.
Call 911 without hesitation.
Start CPR if needed.

“Prepared communities save lives,” says Dr. Benjamin Abella, MD, director of emergency cardiac care research. “Training turns fear into action.”

Being informed — and trained — still makes the difference between life and death.

Updated by Troy Bowman 2026

Severe Weather Safety Tips

In 2011 Atlanta, GA suffered from more severe weather than it has in many years. It seems as though the weather here in Atlanta gets worse every year; with everything from snow storms that last for weeks to a battery of tornados, and thunder storms that rage across the state like an angry bull.

Be Ready For Severe Weather When It Arrives

Severe weather can be frightening but, more than that it can be deadly. Being prepared for severe weather such as tornados, snow storms, floods could mean the difference between life and death for yourself or your loved ones.

Severe Weather Emergency Kits

Before severe weather actually arrives put together several Emergency Kits. Think of places where you might need to keep them in order to be able to get to them in an emergency such as: your home, garage, office, car, barn, or outside storage building, somewhere that you might be able to get to them in a time of need.

In the event of a disaster you will likely need several of these kits. It is advisable that you make one large kit to keep in or around the home, (underground if at all possible) and several smaller kits in other places: office, car, outdoor tool building.

Kit One the Largest and Most Important Kit

Things You Will Need:

* Large Duffle Bag Style Bag

The Bag itself should be a duffle bag style that is weather proof, water proof, and tough. It should be large enough to hold everything in the kit and it needs to have reflective material on the outside or glow in the dark spray paint will work just fine. There is always the chance that you will be trying to find this bag in the dark without a flashlight.

* Water

One of the most important things that we can have in our emergency kits is clean water. Each kit should have at least 3 gallons of water per person in food grade plastic containers. Additional water should be kept for sanitation purposes.

* Food

A three day supply of food for each person should be enough in most situations but, rationing your food during a situation where you aren’t sure when you’ll get more would not be a bad idea. Food that won’t spoil, doesn’t need to be refrigerated, cooked, and doesn’t require a lot of preparation or water to be eatable is best for the emergency kits.


Types of Foods That Will Keep Well For Several Days:

Cereal Bars                Canned Meats                     Canned Juices    Canned Fruits                   Canned Vegetables              Energy Bars

Crackers                             Candy Bars                           Canned Soups

Peanut Butter                     Beef Jerky


* Important Documents of course you won’t keep original documents here but, a sealed dry packet containing copies of all family members important documents could prove to be very helpful in many situations.

Social Security Cards                            Copy of Wills

Bank account numbers                       Insurance Policies

Birth certificates                                   Contracts

Marriage certificates                           Titles

Death certificates                                 Phone numbers

Household inventory                           Passports


More Necessary Items

* Whistle possibly the most important items in your kit. Each person should have a metal police type whistle on a string around their neck during bad weather. If someone were buried or lifted and thrown the sound of that whistle can be heard much farther than a voice.

* Battery Operated radio or even better they kind that can be charged by turning a handle.

* Flashlights and glow sticks (You can buy flashlights that operate buy turning a handle as well)

* Extra batteries

* Dry, comfortable clothing and shoes

* Blankets or water proof sleeping bags if possible

* Plastic rain ponchos (they’re cheap easy to store and very light weight)

* Can opener (manual type)

* Plastic ware

* Sharp Kitchen Knives Be certain that these are wrapped several times in towels or stored in some type of plastic container to prevent someone from getting cut while moving the bag from place to place.

First Aid Kit

In an emergency situation it’s not always possible to get to a doctor right away and a first aid kit could be all that you have so make it as good as you can. You will need at least 2 of these, place one with the large kit and one with the car kit.

The best container for this is a high quality fishing tackle box that is water proof and spray painted with glow in dark paint.

Different types and sizes of Bandages

2” Gauze pads 10pk                        4” Gauze pads 10pk

2” Roll Bandages 3-4 rolls              3” Roll Bandages 3-4 rolls

Vaseline                                             Tweezers

Assorted Band-Aids                         Scissors

Thermometer                                  Needles (one pkg)

Soap                                                 Latex glove

Clean White Towels in Plastic bags

Safety pins (assorted sizes) Use to hold bandages in place.


Medications

Any prescription medication that family members must have should be kept here as well such as insulin, prescription glasses, and medication for high blood pressure.

Over The Counter Medications

Activated Charcoal (for poison control)

Syrup of Ipecac (to induce vomiting incase of poisoning)

Triple- antibiotic                             Peroxide

Alcohol                                            Pain Reliever (non-aspirin)

Antacid                                            Imodium (for relief of diarrhea)

Laxative


Depending on where you’ll be keeping your kits and how much space you actually have the more you are able to put up for an emergency the more comfortable and ready you and your family will be.


It’s a good idea to at least have 2 smaller kits in different places the smaller kits should contain as many of the items as possible and still be portable. Keeping in mind that clean water, food, light, and a whistle are very items to have important during a disaster.


Making sure that you and your family are safe is a full time job we hope that this article has helped to lighten that burden.